
Have you just started working with air dry clay? Or maybe you’ve been at it for a while, but you still keep running into mistakes?
Either way — you’re in the right place.
I started this hobby years ago, and believe me, I’ve been where you are now. So here I’ve collected the most common mistakes I made (more than once 😅) and some easy tips and hacks I learned along the way.
If you don’t have all your supplies yet, I recommend checking out my previous post about what you ACTUALLY need to get started.
So — before you dive into your project, let’s go over some things that might just save you a ton of frustration (and maybe a few ruined pieces).

🎯 10 Things I Messed Up (So You Don’t Have To)
1. Not prepping your clay
Before you start sculpting, warm up your clay a little by kneading and rolling it in your hands. This makes it softer, smoother, and much easier to shape. Here is the clay I use.
2. Using too little or too much water
This one confused me a lot at first. Here’s what I do now:
Don’t mix water into the clay itself. Instead, when you’re shaping your piece, just dab a bit of water on the surface with your fingertips to smooth it out.
If you see cracks or dry areas, dip your hand in water (prepared beforehand) and gently press some water into those spots. No more, no less.
3. Not letting it dry completely
Yes, they say 24 hours is enough — but not always.
Thicker pieces can take up to 2–3 days (or more!). Be patient and wait until it’s completely dry before you paint.
4. Not using sandpaper
Please don’t skip this part. A quick sanding will make a big difference!
The paint sticks much better when the surface is smooth and clean.
You don’t need anything fancy — a basic sandpaper pack like [this one] will do.
5. Not using a primer
At first, I used white acrylic paint to prime my pieces — it worked, but it was expensive and not great.
Then I found out that a cheap primer works even better. Just do 2 light coats, and your colors will pop way more than painting straight onto raw clay.
Here’s the primer I use.
6. Using the wrong paint
This might be obvious to some — but it wasn’t to me.
I started with oil paint and, honestly, it was a disaster. It never dried and ruined my work.
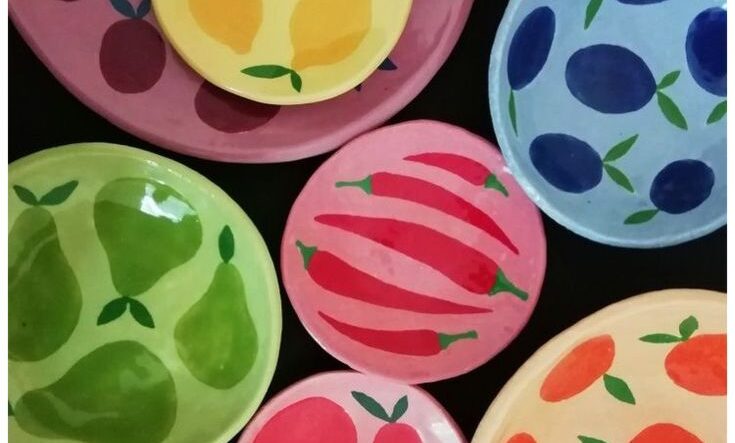
Use acrylic paint only. It dries quickly, lasts longer, and gives a beautiful finish. Here’s a great affordable set I love.
7. Not waiting for the paint to dry
Again, seems obvious — but I didn’t know.
If you glaze while the paint is still wet, you’ll end up with a smudgy mess. So just wait. Trust me
8. Glazing the whole piece at once
Big mistake. You need a part of the piece to rest on while it dries.
I used to glaze the whole thing, put it down, and — yep — the part touching the table stuck and ripped off the glaze and paint.
Now I glaze the top, let it dry, then flip it and do the bottom. Easy fix, saves heartbreak.
9. Not glazing multiple times
Glaze isn’t just for looks — it protects your work.
I usually do 2–3 coats, especially for pieces I want to last longer.
10. Not storing your clay properly
This one messed me up more times than I’d like to admit. Air dry clay dries in the air (duh), so if you don’t seal it properly, it starts hardening even if you don’t use it. I used to just fold the packaging over and call it a day — don’t do that 😅
Instead, store your unused clay in an airtight container or a ziplock bag. I sometimes even wrap it in cling film and put it in a bag — extra safe. That way it stays soft and ready to use for your next project, and you don’t waste money throwing dried-up clay away.

Bonus Tips & Hacks You’ll Love 💡
1. Don’t have a craft mat?
Use baking paper! It won’t stick to your clay and is easy to tape down in the corners so it doesn’t move.
(Just don’t use sandwich wrap — been there, done that, and it was a sticky nightmare 😅)
2. No rolling pin?
Use a kitchen roller! Works like a charm.
3. Speed things up with a hairdryer
Waiting for your clay to dry… and then the primer… and the paint… and the glaze… it takes forever.
A hairdryer is a total lifesaver. Just don’t hold it too close! 😅
4. Don’t worry if it doesn’t look perfect
It’s handmade! A few little imperfections make it unique. I actually love when it looks handmade
5. Cracks? You can fix them later
Seriously — don’t panic if your piece cracks after drying. It’s totally fixable. I’ve got a full guide [here] on how to repair cracks like a pro.
You Got This 🎨
Air dry clay can be tricky — but it’s also so rewarding. You’ll get better with every piece. I hope these tips save you a few mistakes and a lot of frustration.
Happy crafting! 🧡